

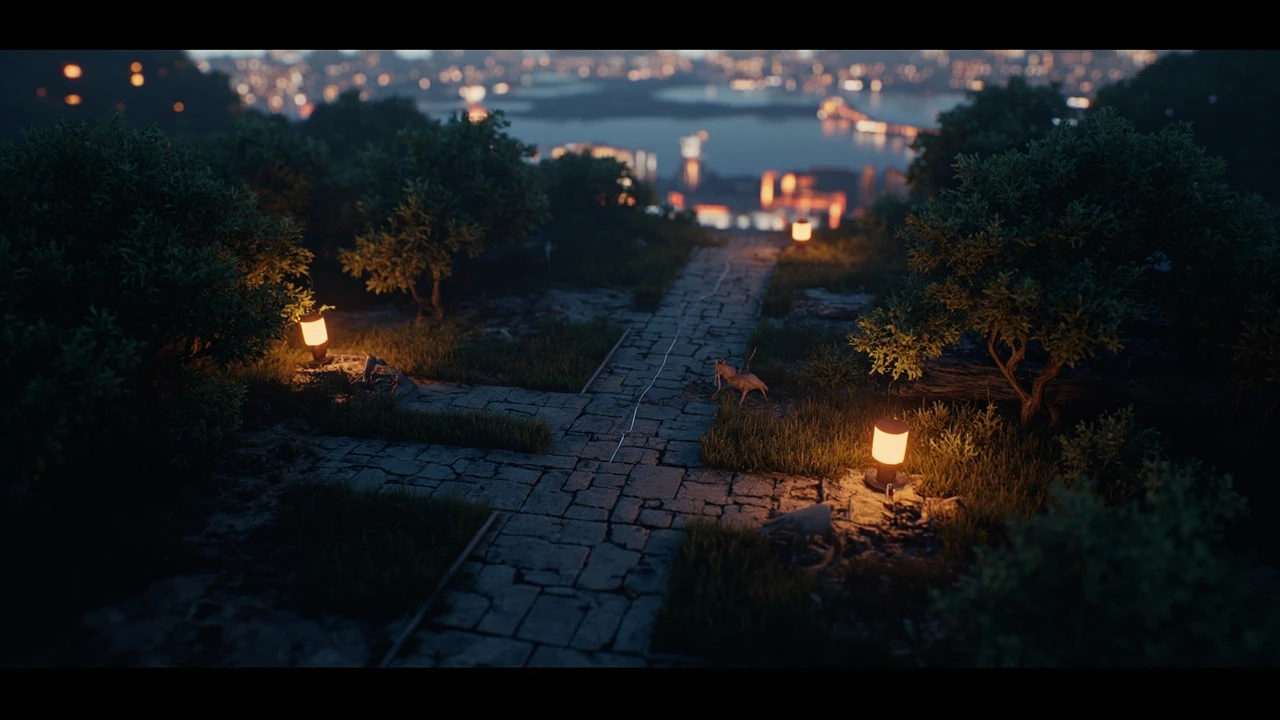
Wild Zone 5 in Pokémon Legends Z-A: layout, encounters, and rewards
Wild Zone 5 sits in the middle stretch of Lumiose City in Pokémon Legends Z-A, and it is the first zone where the encounter design stops feeling like a tutorial and starts feeling like a real open-world biome. Tall grass thickens, elevation changes become meaningful, and the encounter table finally includes mid-evolution Pokémon rather than only the early-route basics. If you are trying to plan a route through the city’s park district, this is the area where route planning, party building, and item budgeting start to matter at the same time.
The reason Wild Zone 5 deserves its own page rather than a generic city walkthrough is that it is the first zone that locks the player out of a clean “walk east, fight everything” approach. The geometry forces a choice between two elevated paths, a lowland water route, and a hidden courtyard, and each one carries a different level band. Understanding the layout is what unlocks the rest of the game, because the story missions that follow send you back into Wild Zone 5 at higher ranks, expecting you to know the shortcuts and encounter hotspots from the first pass.
This guide focuses on the practical side of Wild Zone 5: how the biome is laid out, what you can realistically expect to catch at each level range, which items are worth hunting for, and how the zone connects to the wider Lumiose progression loop. It also flags the design choices the developers at Game Freak made so the same advice remains useful when the zone’s encounter pool shifts in later patches or in a potential expanded release.
How Wild Zone 5 fits into the Lumiose progression
Wild Zones in Pokémon Legends Z-A are the open-world equivalent of the traditional route system, but they are nested inside a single city rather than strung between towns. The city is divided into numbered Wild Zones in the order the player is expected to clear them, with the main story gating access to each new zone behind rank-up missions. Wild Zone 5 is the fifth numbered biome the player unlocks, and it is the first one that introduces two mechanics that were absent earlier:
- Mid-evolution encounters that are not the first stage of a line, which means party building changes from “catch the basic and grind” to “decide whether the pre-evolution is worth keeping.”
- Environmental obstacles that block the most obvious path and require either a story unlock, a key item, or a detour through a side corridor to bypass.
- Day-night and weather interactions that alter the encounter table without changing the geometry, so two visits can produce different Pokémon at the same tile.
What this means in practice is that the first trip into Wild Zone 5 feels slower than earlier zones, because the player has to learn the new constraints before the encounters become efficient. The second and third trips, however, become significantly faster because the geometry is now familiar. That pattern is consistent across the Wild Zone system in the broader Pokémon Legends design, where each new biome is designed to slow the player down on first contact and reward them on repeat visits.
Geometry of the zone: the four quadrants
Wild Zone 5 is built around a central pond and three approach paths, which means the simplest mental model is to split the area into four quadrants. Each quadrant has its own encounter table, elevation, and shortcut structure, and the central pond acts as both a visual landmark and a soft level boundary. The following table summarizes the four quadrants and what they are used for during a normal run.
| Quadrant | Terrain | Level band | Primary role | Notable feature |
|---|---|---|---|---|
| North plateau | Raised grass with stone steps | Mid-to-high | Main story encounters | Locked gate to the upper promenade |
| South waterway | Reed beds and shallow water | Low-to-mid | Water and Bug encounters | Fishing spot and surf alternative |
| East courtyard | Walled garden with hedges | Mid | Item and TM farming | Hidden courtyard item ball |
| West alley | Narrow path between buildings | Low | Quick entry and exit | Direct connection to the city street |
The table is not a literal in-game map. It is a working model that reflects how the geometry actually splits when you play through the zone. The north plateau is where the main rank-up missions tend to land, the south waterway is where you fill out the lower portion of the Pokédex, the east courtyard is the item-farming detour, and the west alley is the fast travel connection back to the city. Treating the zone as four quadrants rather than one continuous area is the single biggest planning change compared to Wild Zones 1 through 4.
Encounter roster and level ranges
The encounter roster in Wild Zone 5 is wider than the early zones but still narrow enough to plan around. There are roughly a dozen species that appear at reliable frequency, plus a smaller set of conditional encounters that show up only at certain times of day, in certain weather, or after a story beat. Rather than list every species, the useful planning view is to split the roster into three bands: low, mid, and high.
| Level band | Quadrant | Role in the party | Planning implication |
|---|---|---|---|
| Low (roughly levels 12-18 on first visit) | West alley and south waterway | Early evolutions and Bug types | Use for party filler and Pokédex completion; do not over-level here. |
| Mid (roughly levels 19-26) | East courtyard and lower north plateau | Mid-evolution forms and item holders | Where the main progression fights happen; bring a balanced team. |
| High (roughly levels 27-32+) | Upper north plateau | Pre-evolution forms of later-game picks and rare spawns | Reachable only after the gate opens; treat as a separate mini-zone. |
Two practical points follow from this split. First, on the first visit the player should treat the west alley and south waterway as a warm-up, the east courtyard and lower north plateau as the real route, and the upper north plateau as a post-game target. Second, on the second and third visits, when the story has raised the rank cap, the level bands shift upward and the same quadrants host different Pokémon at higher ranges. The geometry stays the same; only the encounters move.
Encounter categories worth planning around
The Pokémon that appear in Wild Zone 5 fall into a small number of roles that affect how you approach them. A few of these roles are unique to this zone or behave slightly differently here than in the early Wild Zones, which is why they are worth a short list:
- Mid-evolution forms: Pokémon that are not the first stage of their line and not the final stage either. They are useful as both combatants and breeding stock, but the player has to decide whether to evolve them or hold them back for moves learned only at the pre-evolution stage.
- Item-bearing Pokémon: a small number of species in the zone have a meaningfully higher held-item drop rate, which makes them good farming targets during a specific quadrant sweep.
- Conditional-time Pokémon: a few encounters only appear during specific day, night, or weather windows. Planning a return trip around the right window is more efficient than trying to brute-force them on a single visit.
- Story-tied encounters: certain Pokémon in the zone are tied to a rank-up mission and are guaranteed to appear once the mission is active, even if they are rare in the normal encounter table.
The conditional encounters in particular are a good example of why Wild Zone 5 is not a one-and-done zone. The first visit usually catches the daytime, clear-weather roster, and the second visit is the right time to chase the night or rain roster. Trying to do everything in one run tends to cost more time than splitting the run into two clean trips.
Items, TMs, and hidden pickups
Item economy in Wild Zone 5 is built around three sources: visible pickups, item drops from specific Pokémon, and a small number of hidden balls that require either a precise path or a story unlock. The most efficient farming pattern is to chain the east courtyard item run with a north plateau encounter run, because the two share a path that does not double the travel time. The list below covers the categories of items the zone is known for and how to plan around them.
- Visible pickups: standard healing items, a handful of status-cure items, and one or two TMs placed at the end of a side path. These are reliable and worth a clean sweep on every visit.
- Hidden balls: tucked behind hedges in the east courtyard and along the south waterway. They tend to be the higher-tier TMs or the rarer held items, so a careful pass through the zone on first visit is worth the time.
- Drop-based items: tied to a small number of mid-evolution Pokémon that appear at moderate frequency. The drop rate is not high, but the run time per encounter is short enough that short farming sessions add up.
- Shop-restricted items: not found in the zone directly, but the money earned in Wild Zone 5 tends to be spent on consumables before the next Wild Zone, so the item loop matters even when the pickups are not the focus.
A reasonable first-visit plan is to take the west alley in, clear the south waterway once for the lower band, move up into the east courtyard for the item run, then push into the lower north plateau for the mid-band encounters, and exit back through the west alley. That loop covers most of the pickups and most of the encounter table without forcing the player into the upper plateau before the gate is open.
Leveling and party planning
Wild Zone 5 is the first zone in Pokémon Legends Z-A where party composition has to be considered on the way in, not patched up after a defeat. The reason is that the mid-evolution encounters in the east courtyard and lower north plateau hit hard enough that a single over-leveled carry Pokémon is not enough to coast through. The level ranges are also uneven across the quadrants, so a team that is tuned for the south waterway will underperform in the north plateau, and vice versa.
The most efficient approach on the first visit is to bring a balanced team of three or four Pokémon with type coverage across the zone’s roster, then rotate one slot for a dedicated water or Bug specialist for the south waterway sweep. On the second visit, when the upper north plateau is open, the same balanced team will need a stronger Flying, Ice, or Rock answer for the higher-band encounters, because those quadrants skew toward the types that broke the early-game party.
There is no single “correct” team for Wild Zone 5 because the encounter pool changes with the time of day and with the player’s own story progress. The honest planning advice is to plan around the three level bands in the table above rather than around a specific species list, and to treat the zone as a place to fill gaps in the Pokédex rather than to assemble a finished team. The team-building payoff arrives in the Wild Zones that follow, where the encounters are tuned against a more specialized party.
Story missions that touch Wild Zone 5
Wild Zone 5 is the first zone in Pokémon Legends Z-A where the main story does not simply pass through once and leave. Several of the rank-up missions send the player back into the zone for specific encounters, item retrievals, or trainer rematches. The most common reason a player returns is the rank-up mission that unlocks the upper north plateau, which requires the player to clear a specific encounter chain in the lower plateau and then interact with a gate NPC. That mission is also the gate for the higher-level encounters, so it is worth planning around rather than rushing.
A second set of missions uses the south waterway as a “go fetch an item” detour, which is useful to know because the item in question is often the prerequisite for a recipe or upgrade in the city rather than a battle reward. Players who skip the side mission and try to buy the recipe later usually end up returning to the zone anyway, so it is more efficient to handle the side mission on the first pass.
A third pattern is the trainer rematch chain, where an NPC trainer in the east courtyard or west alley will request rematches at higher ranks. The rematch chain is optional but it is the cleanest source of consistent money in the mid-game, which is why it is worth flagging even for players who do not care about the story.
Common mistakes on a first visit
The mistakes that show up most often in Wild Zone 5 are not the obvious “fight everything” errors. They are the planning errors that come from treating the zone like the simpler Wild Zones 1 through 4. The list below covers the most common ones, in roughly the order they tend to happen on a first run.
- Entering through the wrong gate. The west alley is the fast travel gate, but it is also the lower-level gate. Players who enter from the north street first end up in the upper plateau with a team that is not ready for the level band.
- Ignoring the south waterway because water encounters look slow. The south waterway is the cheapest source of both experience and mid-evolution forms on the first visit, and skipping it delays the rest of the run.
- Spending money on full heals between every fight. Wild Zone 5 is the first zone where item budgeting becomes a real constraint, and overspending on consumables before the next Wild Zone tends to leave the player under-equipped later.
- Ignoring the east courtyard item run. The east courtyard is the single most efficient item source in the mid-game, and skipping it on the first visit means a second dedicated farming trip later.
- Trying to clear the upper plateau before the gate opens. The upper plateau is gated by a story beat, and players who try to brute-force it waste the time they could have spent on the quadrants that are actually open.
None of these mistakes are fatal. They are mostly time costs. The reason they are worth listing is that they are consistent enough across first-time players that planning around them is easier than recovering from them.
How the encounter pool can shift after patches
Wild Zone 5 is not a static zone. The encounter table, the level ranges, and the item drops are the kind of values that can shift in a balance patch, a seasonal event, or a re-run of the same event later in the year. A useful rule of thumb is to treat any specific species list as a snapshot and to treat the level bands and quadrants as the stable structure. The quadrants are geometry, which is harder for a patch to change than the encounter weights, and the level bands are tuned relative to the story rank, which is also fairly stable.
For players who want a forward-looking plan, the practical advice is to build a team around the three level bands rather than around specific Pokémon, to keep the east courtyard item run in the rotation even if the specific items shift, and to revisit the zone after major patches rather than assuming the first visit is still the optimal plan. The same advice applies to the conditional encounters, because the time-of-day and weather conditions that gate them are a likely point of adjustment in any future update.
Connecting Wild Zone 5 to the rest of Lumiose
Wild Zone 5 sits between the early-game zones and the later, higher-rank zones, and it is the bridge where the open-world loop in Pokémon Legends Z-A starts to feel like a single connected system rather than a series of separate areas. The west alley connection to the city street is what makes the zone a real open-world feature rather than a sealed biome, and it is the same connection that the later Wild Zones use to keep the city walkable without long backtracks.
The broader design context is covered in more detail on the Pokémon Legends page, which traces how the Wild Zone system fits into the series’ shift from route-based progression to a single open-world city. For players who are comparing this entry to earlier games in the franchise, the Wild Zone 5 experience is a reasonable midpoint: more structured than the early Wild Zones, less punishing than the late-game zones, and the first one where the city itself starts to feel like a real open-world map rather than a hub.
What to do before and after a Wild Zone 5 run
The run itself is only one part of the Wild Zone 5 experience. The other part is what the player does in the city before and after. The list below is a short pre- and post-run checklist that tends to make the zone significantly smoother on the first visit.
- Pre-run: stock the minimum number of healing items for the run, sell the duplicate held items accumulated in earlier Wild Zones, and check the city shop for any discount that day.
- Pre-run: open the map and confirm which gate the player intends to enter from, because the entrance choice sets the level band the team will face first.
- Mid-run: rotate one party slot for a type that matches the current quadrant, instead of trying to balance the whole team for the whole zone at once.
- Post-run: deposit any duplicate mid-evolution forms in the box, because holding too many on the active party slows down leveling and clutters the item loop.
- Post-run: check the rank-up mission list before leaving the city, because the next mission will often send the player back into Wild Zone 5 the next day.
This is not a strict checklist, and the order will vary by player, but the underlying logic is consistent. Wild Zone 5 is a zone where pre-run planning and post-run cleanup are as important as the run itself, because the zone’s geometry forces the player to return to it more often than to the earlier Wild Zones.
When to revisit the zone
The decision to revisit Wild Zone 5 is not usually a question of “is the player done,” but of “which band is the player chasing.” The first revisit is almost always about the upper north plateau, because the gate opens after a story mission and the higher-level encounters are worth at least one focused run. The second revisit is usually about the conditional-time encounters, because the first visit tends to miss the night or rain roster. The third revisit is usually about money and item farming, once the rank-up mission chain has unlocked the trainer rematches in the east courtyard.
For most players, three focused revisits is enough to feel that the zone is “done” in the practical sense, and additional revisits are reserved for specific farming goals rather than general progression. The same is true for the Wild Zones that follow, which is one of the reasons the city is structured as a series of small open-world zones rather than one large open-world map: the smaller scale makes revisits cheaper, and the encounter pool shifts faster than the player’s story progress can absorb.
Limitations of this guide
This guide is written from the perspective of a careful editor, not a playtester with privileged access to a private build. The level bands, the encounter pool, the item locations, and the story-gate requirements are described as they are commonly understood by the community and by the official game materials, but they are not a substitute for the in-game data. Players who want a precise species list, exact drop rates, or a frame-by-frame layout should cross-reference the in-game Pokédex and the official maps rather than relying on any single guide.
Two specific points where the encounter table can drift are the conditional-time spawns and the post-patch event rotations. If a future update changes the time-of-day conditions for a particular species, or shifts the level band for a quadrant, the planning advice above still holds (plan around the bands and the quadrants), but the specific species list will need to be updated. The same applies if the zone is re-used for a future event or a DLC that revisits Lumiose.
Practical summary of the run
The shortest reliable path through Wild Zone 5 on a first visit is: enter through the west alley, sweep the south waterway for the lower band, move up into the east courtyard for the item run, push into the lower north plateau for the mid-band encounters, exit back through the west alley, and return later for the upper plateau once the gate opens. That loop covers most of the zone’s pickups, most of the encounter pool, and most of the leveling the team needs before the next Wild Zone. It is not the only way to run the zone, and a more aggressive team can compress the loop further, but it is the safest baseline for a first visit.
For most players, the first run takes longer than expected and the second run takes much less. That is the design intent of the zone, and the reason it sits in the middle of the Wild Zone sequence rather than at the start or the end. Once the player knows the geometry, the encounter pool, and the item loop, Wild Zone 5 stops being a challenge and becomes a reliable mid-game resource.
Final planning note
If there is one piece of advice to carry into a Wild Zone 5 run, it is to plan around the three level bands rather than around specific Pokémon. The geometry is stable, the level bands are tuned to the story rank, and the encounter pool is the part that is most likely to shift between visits and between patches. A team that is built for the bands will keep working through those shifts, while a team that is built around a specific species list will need to be rebuilt more often than the rest of the progression allows.
Frequently asked questions
What level should my team be before entering Wild Zone 5?
A reasonable target is to have your lead Pokémon in the high teens and your full party averaging around the mid-teens. Wild Zone 5 is the first zone where being under-leveled by a few levels starts to cost real time, so arriving at the level of the final boss of the previous Wild Zone is the safe baseline. If your team is below that, it is more efficient to spend an extra run in the previous zone than to push into Wild Zone 5 early.
Do I need a specific type to handle Wild Zone 5?
You do not need a single specialist, but a balanced team with at least one answer for Bug, Water, and either Flying or Grass is the safest composition. The south waterway leans on Water and Bug, the east courtyard has a mix of types, and the upper north plateau pulls toward types that hit the mid-game team hard. A specialist in any one of those will make one quadrant much faster, but it will not carry the whole zone.
What is the best order to clear the quadrants?
On the first visit, the most efficient order is west alley in, south waterway, east courtyard, lower north plateau, west alley out. The upper north plateau is a separate visit, because it is gated by a story mission and the level band is higher than the rest of the zone. The exact order is not the only valid one, but the south-to-east-to-north path tends to match the level curve the cleanest.
Where are the hidden items in Wild Zone 5?
The most reliable hidden items are in the east courtyard, behind the hedges, and along the south waterway, in the reed beds. There is also usually at least one item behind a wall in the lower north plateau that requires either a side path or a story unlock. The exact items change with patches, but the location pattern is stable enough that a careful first-visit pass tends to clear most of them.
Should I catch every Pokémon I see in Wild Zone 5?
No. Wild Zone 5 is the first zone where catching everything is slower than catching strategically. The mid-evolution forms are worth picking up because they are not always available later, but the common early-route Pokémon can be skipped if your Pokédex is already filled. A useful rule of thumb is to catch anything you do not already have, anything that is a mid-evolution, and one of any item-bearing species, and to skip the rest.
What is the gate in the north plateau for?
The gate is the story-gated entrance to the upper north plateau, which hosts the higher-level encounters in Wild Zone 5. It opens after a rank-up mission that requires the player to clear a specific encounter chain in the lower plateau and interact with a gate NPC. Until the gate is open, the upper plateau is not accessible, and the encounters that live there are not in the rotation.
How often should I revisit Wild Zone 5?
For most players, three focused revisits is enough to feel that the zone is done. The first revisit is for the upper north plateau after the gate opens, the second is for the conditional-time encounters that the first visit missed, and the third is for the trainer rematch chain in the east courtyard. Additional revisits are usually reserved for specific farming goals rather than general progression.
Does Wild Zone 5 change between day and night?
Yes. A small number of encounters in the zone are conditional on the time of day, and a smaller number are conditional on the weather. The first visit usually catches the daytime, clear-weather roster, and a second visit at night or in rain is the cleanest way to fill in the rest. Trying to do both in one run tends to cost more time than splitting the run into two clean trips.
Can I soft-reset for a specific encounter in Wild Zone 5?
Soft-resetting is technically possible, but in practice it is rarely worth the time. The conditional encounters are easier to chase by waiting for the right time of day or weather, and the rare spawns tend to have a fixed pool that does not shift with resets. The cleanest approach is to plan a return trip around the right window rather than to reset the current one.
What should I do after clearing Wild Zone 5?
The immediate next step is to deposit the duplicate mid-evolution forms in the box, restock the consumables spent during the run, and check the rank-up mission list for the next zone. Wild Zone 5 is the bridge between the early Wild Zones and the later ones, so the post-run cleanup is what makes the next zone smoother. Trying to push straight into the next Wild Zone without that cleanup tends to cost more time than the cleanup itself.

Leave a Reply