

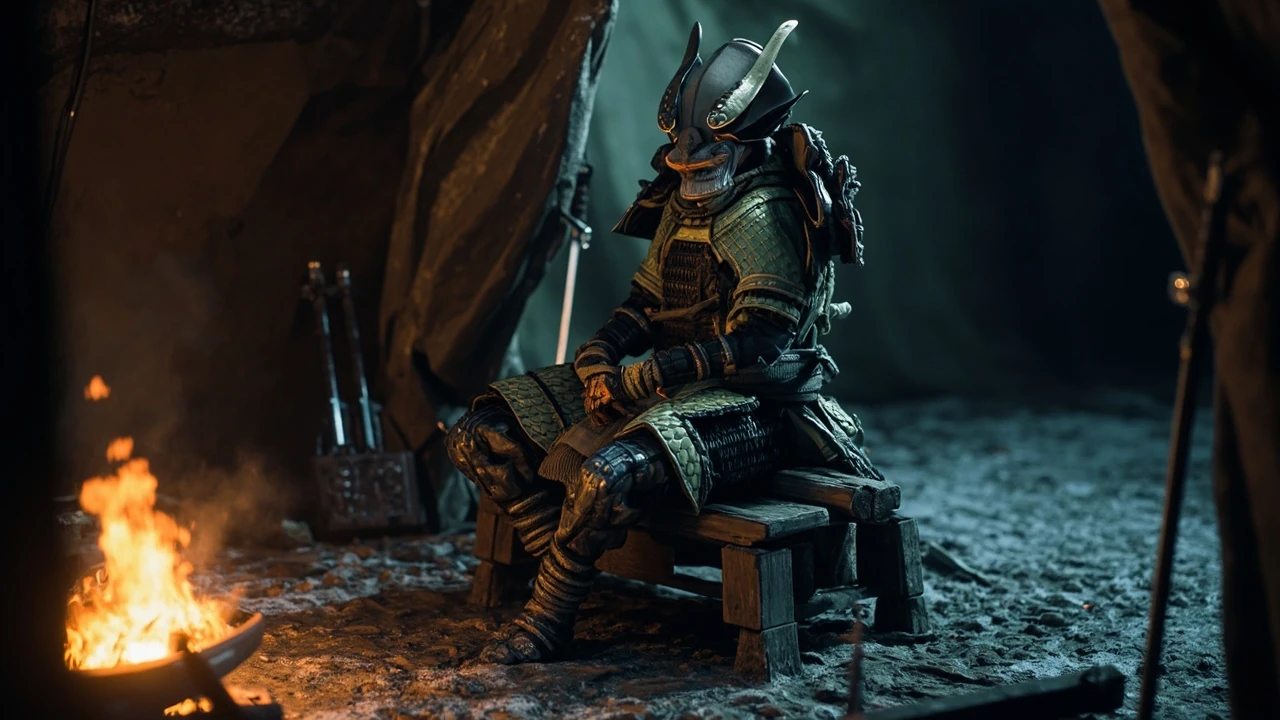
Ghost of Yotei snake armor: a practical field guide for Atsu’s next set
Snake-themed gear has a long history in open-world action games because it lets a designer link a single visual identity to a full combat identity. In Ghost of Yōtei, the ghost of yotei snake armor follows that tradition: it is a mid-to-late game set that signals a particular playstyle around parries, dual-wielded swords, and quiet takedowns, and it asks the player to commit to a specific material grind before its full potential unlocks. This guide covers what the set is, where to find the base pieces, which upgrade path actually matters, and how it changes fights in the northern wilds of Ezo. The notes are written for a player who has already cleared the first few regions, knows how to dismantle loot, and wants a clear plan instead of vague hints.
The set lives in a specific design corridor. It is too specialized for a new player, too expensive for a casual one, and too rewarding for a player who has already learned the parry window from a simpler set. Knowing that corridor matters more than memorizing the route, because the same armor will feel like a chore in a build that does not support it and a revelation in a build that does. The rest of the guide assumes the player is in the second situation.
What the snake armor actually represents
The snake armor is one of several named gear sets in Atsu’s wardrobe system. Each set has a head piece, a body piece, gloves, and a leg piece, plus an associated weapon pairing that the game nudges the player toward but never forces. The snake set is themed around Ezo’s Ainu-influenced folklore, where serpents are tied to rivers, boundary places, and protective spirits. Mechanically, the set favors rapid directional changes, mid-range pressure, and stun chaining after a successful parry. It is not a tank set, it is not a ranged set, and it is not a stealth-only set, although it pairs well with the latter.
Two things make the snake armor stand out from the other options a player will encounter by the time they reach the northern half of the map. First, its set bonus has the strongest interaction with the parry window of any medium-tier armor in the game. Second, its upgrade chain is the most material-gated of any set that is not locked behind the final region, which means the player has to plan the grind rather than absorb it passively while exploring. That second point is where most players lose patience, so the rest of the guide is mostly about how to skip the parts of the grind that waste time.
How the set fits into the game’s gear system
Before walking through the locations, it helps to know how the system treats armor in general. The game uses four slots per set: head, body, gloves, and legs. Each slot can be equipped independently, so a player can mix pieces from different sets, but the set bonus only activates when all four matching pieces are worn. The set bonus is described in plain text in the inventory, and each bonus has both a passive and a trigger component. The passive is always active, the trigger only fires under a specific combat condition.
The snake armor’s passive raises the damage of the first attack after any successful parry by a flat percentage that scales with upgrade level. Its trigger increases the brief window during which a deflected enemy can be counter-hit with a heavy attack, and it slightly extends the i-frames on the dodge that follows a parry. Both effects are designed around one play pattern: bait an attack, deflect it, and convert the deflect into a heavy follow-up before the enemy can recover. The numbers are small at +1, noticeable at +3, and decisive at +5, which is why the upgrade path matters more than the piece you wear first.
Upgrading the set is where most of the meaningful work happens. Each piece has six upgrade levels, and the materials are not interchangeable with the other sets. Snake pieces ask for a specific scale, a specific fang, and a regional plant that only grows in the river valleys of the central-northern map. Players who try to force the upgrades by buying from a vendor will find the vendor stock both limited and randomized, which is why most players end up farming the materials in a focused route rather than passively picking them up. The route section later in the guide gives a concrete order of operations for that farm.
Where to find the base pieces
The base set is not gated behind a single quest. Instead, the four pieces are distributed across three different activities, which keeps the player from blowing through the set in one session. The table below summarizes the unlock conditions for each piece based on the public game build.
| Piece | Where it unlocks | Activity type | Prerequisite |
|---|---|---|---|
| Head (Snake Kabuto) | Bounty at the Kinei Taro River | Named bounty, recommended level 18-22 | Reach the central river valley region |
| Body (Snake Do) | Hidden merchant at the abandoned Ainu lakeside village | Vendor with rotating stock | Discover the village by completing the side tale “Still Water” |
| Gloves (Snake Kote) | Reward for clearing the snake-themed shrine challenge | Platforming and timing shrine | Find the shrine marker on the eastern ridge |
| Legs (Snake Suneate) | Looted from the mini-boss in the second bandit camp of the upper forest | Camp clear, mini-boss arena | Clear at least one bandit camp in the region |
The head piece is the anchor of the set because the bounty that drops it is the most reliable of the four unlocks. Bounties in this region are board quests, so the player can replay them if they want a second copy for a different upgrade path or to help a friend who is still early in the region. The body piece is the one most players miss, because the merchant only appears after a specific side tale and the stock rotates on a hidden timer that is shorter than most vendors in the game. If the merchant does not have the Snake Do on the visit, the player can fast-travel away and back to refresh the inventory without losing progress on the side tale.
The gloves come from a shrine that tests a specific timing pattern. The shrine is short, but it punishes players who try to brute force it, because the snake-themed shrine uses a strike-counter mechanic rather than a free-form platforming one. The legs are the easiest piece to get on paper, but the mini-boss arena is shared with two elite enemies, so the player should clear the surrounding camp first to avoid a three-on-one fight. Once the camp is empty, the arena collapses to a clean 1v1, and the legs drop on the first kill.
A useful habit when hunting any of these pieces is to bring a fast-travel pack before the player leaves the safe zone. Several of the unlock locations are off the main path, and returning to them later costs more time than the piece is worth if the player forgot to unlock the local fast-travel point. The snake set is generous once you commit, but it is not generous when you are looking for a single piece on a long walk back.
Upgrade materials and what each tier actually does
Upgrades follow a fixed ladder, and each ladder step changes how the set behaves in a fight. Knowing what each tier actually does prevents the player from wasting materials on a piece they plan to replace in two regions. The ladder is the same for every piece, but the order in which you push pieces is the player’s choice, and that choice matters for early game performance.
| Upgrade level | Materials required per piece | Stat change | Set bonus effect at this tier |
|---|---|---|---|
| +1 | 3 Snake Scale, 1 River Reed | Light defense bump, no set bonus change | Passive only |
| +2 | 5 Snake Scale, 2 Snake Fang, 2 River Reed | Stamina cost on parry reduced by one tier | Passive + first half of trigger window |
| +3 | 8 Snake Scale, 4 Snake Fang, 4 River Reed, 1 Serpent Carving | Counter-hit damage raised by 8% | Passive + full trigger window |
| +4 | 12 Snake Scale, 6 Snake Fang, 6 River Reed, 2 Serpent Carving, 1 Ezo Lacquer | Defense raised, weight slightly reduced | Passive + trigger window + dodge i-frame extension |
| +5 | 18 Snake Scale, 8 Snake Fang, 8 River Reed, 3 Serpent Carving, 2 Ezo Lacquer | All stats at nominal cap for the set | Same effects, scaled values |
| +6 | 25 Snake Scale, 12 Snake Fang, 10 River Reed, 4 Serpent Carving, 3 Ezo Lacquer, 1 Mythic Coil | Cap raised slightly for a single sub-stat | All effects at maximum scaling |
The first two tiers are low-cost and are worth doing on every piece as soon as the player has the materials. The third tier is the meaningful breakpoint, because the full trigger window only opens at +3, and the difference between fighting with half a window and a full one is the difference between a reliable punish and a coin-flip punish. The fourth and fifth tiers are optimization steps for players who plan to wear the set into the final region. The sixth tier is a prestige upgrade that is not required to clear any main story content, and the Mythic Coil drops from a single late-game challenge that some players may want to skip if they are already invested in a different end-game build.
Order of operations is worth thinking about before the player dumps a stockpile into one piece. The head and the gloves give the most visible benefit per tier, because the head controls the set’s visual identity and the gloves control the most-used parry animation. A reasonable target is to push both to +3 first, then return for the body and legs once the player is farming the river valley anyway. This order keeps the player’s mid-game fights smooth without burning the materials that the +4 and +5 tiers will need later.
How to farm Snake Scale and Snake Fang efficiently
Both materials drop from the snake-type enemies in the river valleys, and both have a small chance to drop from standard wildlife in the same region. Farming them by killing respawning snake enemies is slow, because the respawn timer is long and the drop rate is single-digit. The more reliable path is to clear the three open-world activities that award these materials as a fixed reward. The activities are listed below in order of materials-per-minute, based on community tracking rather than the game’s own hint system.
- Snake den clearing: a small camp event in the eastern river valley. Resets on a short timer, awards a guaranteed 4-6 Snake Scale per clear, and rarely includes a fang drop on the first clear of the day.
- Bounty replay: the same bounty that awards the head piece also drops 2-3 Snake Fang on completion. Replaying it after the head is unlocked is the cleanest Fang source, and the route is short enough to chain three runs in a sitting.
- Shrine challenge: the snake-themed shrine awards 3 River Reed and 1 Snake Fang on a successful run, which is a useful side benefit while practicing the timing pattern. The shrine is also one of the few repeatable activities in the region that scales with the player’s level, so it stays relevant longer than the others.
- Wildlife loop: hunting the river otters and certain birds in the same area adds 0-2 Snake Scale per cycle. It is filler, but it helps when the player is between other activities or waiting for the snake den to respawn.
A practical farm cycle for a single evening looks like this: start at the snake den, clear it, fast-travel to the bounty board, replay the head bounty, fast-travel to the shrine, clear the shrine, and finish at the wildlife loop near the camp. Two full cycles of that route produces enough Snake Scale and Fang to push two pieces to +3 without dipping into the player’s passive stockpile. Players who run the cycle three times in a row usually end the evening with the head and gloves at +3 and a comfortable buffer for the body and legs.
Serpent Carvings and Ezo Lacquer are not farmable in the same way. Serpent Carvings drop from the shrine boss replay, and Ezo Lacquer comes from dismantling gear pieces of equal or higher rarity. Players who plan to push the set to +4 or +5 should start stockpiling Ezo Lacquer early, because the supply is shared across every other set they are also upgrading, and dismantling too early can leave the player short for the late tiers of a set they would rather have built.
For players who want a deeper look at the production decisions behind the set’s design and the wider world of Ezo, the DigiPen showcase on producing Ghost of Yōtei walks through how the team approached non-linear open-world production for the game. A broader overview of the title, its setting, and its place in the series is available on the Ghost of Yōtei English Wikipedia page, which provides useful background on the studio and the cultural setting.
Combat playstyle with the full set bonus
The set rewards a specific rhythm. The player opens with a mid-range poke to bait a heavy attack, parries the heavy attack with the L1 button, and immediately follows with a heavy of their own during the extended counter window. The trigger window is what makes this loop land reliably, because the enemy cannot block, dodge, or counter-attack during the brief i-frame extension on the player’s follow-up dodge. Without the full set bonus, the same loop still works, but the punish window is shorter and the player is more exposed if the parry timing is off by a frame.
In practice, the set is strongest in one-on-one duels and against enemies with telegraphed heavy attacks. It is weaker in crowd fights, because the passive only fires on a single parry at a time, and the trigger window resets on each new enemy. Players who want to use the set in bandit camp clears should pair it with a quick-step weapon in the off-hand and focus on thinning the group before committing to the parry loop. Trying to parry in a crowd without a clean target usually results in two hits landing at once, which breaks the loop and costs the player the stamina they were saving for the counter.
Weapon pairing matters more with the snake set than with most others. The recommended pairings are the River Cutter katana and the short tanto. The katana handles the heavy follow-up, and the tanto handles the gap-closing poke. A bow or a long spear in the off-hand undermines the set, because the trigger window only opens after a melee parry, and ranged attacks do not register as parries for the bonus. The weapon art on the River Cutter is also one of the few that does not cancel the parry recovery animation, which is another small reason it sits well in the build.
Stamina management is the third leg of the build. The set reduces the stamina cost of the parry itself, but the follow-up heavy still costs the same as any other heavy, and the dodge that follows costs more than a normal dodge because the i-frames are extended. Players who try to chain three parries in a row without letting stamina regenerate will find themselves stuck in the recovery animation on the third loop, and the trigger window does not protect against a stamina break. The cleanest rhythm is two parries, a short recovery, and then back into the loop.
How the set compares to the other named armor sets
Players will encounter at least three other named sets by the time they unlock the snake armor. The table below compares the sets on the dimensions that actually matter for a mid-game player choosing what to invest in. The numbers are drawn from the in-game stat sheet and from community tracking of the relevant duels.
| Set | Primary stat focus | Best combat loop | Upgrade material difficulty | Stealth synergy |
|---|---|---|---|---|
| Snake | Parry and counter-hit damage | Parry into heavy follow-up | High | Medium |
| Wolf | Raw damage and stamina | Aggressive chain attacks | Medium | Low |
| Crane | Dodge i-frames and ranged defense | Dodge into counter | Low | Low |
| Bear | Defense and poise | Trade hits, then retaliate | High | Low |
The snake set is the most specialized of the four. The wolf set is the easiest to learn, the crane set is the most forgiving on timing, and the bear set is the safest against unfamiliar enemy types. A player who commits to the snake set is trading ease of use for the highest single-target punish window in the mid-game, which is a fair trade for a player who has already learned the parry timing from the wolf set’s lighter bonuses. The crane set is the closest substitute if the player wants a similar rhythm with a lower material cost, but the punish window is shorter and the build loses the counter-hit damage that makes the snake set feel decisive in duels.
It is also worth noting that the bear set and the snake set pull from different parts of the same material economy. Players who plan to build both should expect the Ezo Lacquer supply to feel tight, because both sets share the same rare resource. The wolf set is the easiest to maintain alongside a snake build, because its materials come from a different region and its upgrade cost is lower per tier.
Common mistakes when building the set
Most problems with the snake set come from a small set of recurring mistakes. The list below names the ones that show up most often in community reports and in the game’s own hint system, with a short note on how to recover from each one.
- Upgrading pieces in the wrong order. The gloves and the head give the most visible benefit per tier, and should be pushed to +3 before the body and legs. The body and legs gain the same percentage bonuses, but the player feels the gloves and the head on every parry, which is where the set lives.
- Mixing set pieces with wolf or bear pieces. The set bonus only activates when all four pieces match, so a hybrid build is weaker than either set on its own. If the player wants a hybrid feel, the right move is to switch sets between regions, not within a single fight.
- Spending Serpent Carvings on the wrong set. Each named set uses a different carving, and they are not interchangeable. The carving vendor in the central town will sell the snake version, but only after the player has cleared the snake shrine once, and the price is the same for every set.
- Ignoring the body piece merchant’s rotation. If the player visits the merchant once and does not see the Snake Do, they often assume the set is bugged. The rotation refreshes on a short timer, and the merchant is also gated by the side tale “Still Water,” which has to be completed before the merchant will spawn at all.
- Equipping a heavy bow in the off-hand. The set bonus is gated to melee parries, and ranged combat never triggers the trigger window. Players who like to mix ranged and melee in a single fight should use the snake set’s head and gloves only, and accept the loss of the set bonus for the convenience of a ranged off-hand.
Each of these mistakes is recoverable. The set’s upgrade cost is high, but it is not the highest in the game, and the player is not locked out of any story content by choosing a different set instead. The set is a strong choice for a specific playstyle, not a required one. Most players who regret the choice regret the order in which they upgraded, not the choice of set itself.
When the snake set stops being the best choice
The set is a mid-to-late game set, and there is a point in the final region where another set pulls ahead. The final region introduces enemies with attack patterns that are faster and more varied, and the parry window on those enemies is shorter. The snake set’s trigger window is still useful, but the dodge i-frame extension becomes the deciding factor, and the bear set’s poise bonus starts to compete. Players who plan to push the set into the final region should plan to switch to a hybrid approach by the time they reach the final area’s first major duel.
For players who do not plan to go past the final region’s first chapter, the snake set is a comfortable end-game choice. The full +5 build is more than enough for the remaining story content, and the set’s visual identity holds up in the late-game cutscenes because the snake theme is tied to a specific narrative beat that the player will have unlocked by then. The set is also the one most often paired with the final side tale that ties the snake folklore back to Atsu’s personal arc, which is a small reason it feels more complete than the others by the time credits roll.
A reasonable rule of thumb is to keep the snake set as the primary set through the central-northern region and the first chapter of the final region, then re-evaluate after the first major duel. If the duel felt clean, the player can keep the set. If the duel felt like a string of mistimed parries, it is worth switching to the bear set for the rest of the final region and treating the snake set as a strong mid-game build that has done its job.
Quick checklist before you start the grind
Before committing to the snake set, run through the checklist below. It is short, and it saves a full evening of farming by catching the easy mistakes early. None of the items are optional, because each one removes a common time sink that shows up in the first hour of the grind.
- Confirm that the central river valley region is unlocked and that Atsu is at least level 18. Below 18 the bounty is still clearable, but the materials per run are slightly reduced and the mini-boss arena adds two extra elites that the player does not need to fight.
- Pick up the side tale “Still Water” so the lakeside merchant becomes a fast-travel option. Without the side tale, the merchant does not spawn at all, and the body piece has to be bought from a generic vendor in the central town at a higher price.
- Clear one bandit camp in the upper forest so the legs mini-boss is reachable. The camp itself is also a useful early source of Ezo Lacquer, which the player will need for the +4 and +5 tiers.
- Stockpile at least 20 River Reed from passive exploration so the early upgrade tiers are not blocked. River Reed is the only material that is common enough to ignore, and ignoring it is the most common reason a player stalls at +2.
- Decide whether the set is the player’s primary set for the next two regions. If not, push only the head and gloves to +3 and treat the rest as a cosmetic option. A half-built snake set is weaker than a full wolf set, and the player is better off committing to one or the other.
Frequently asked questions
Is the ghost of yotei snake armor a hidden set or a quest reward?
It is a hybrid. The head piece is a bounty reward, the body piece is a vendor purchase, the gloves are a shrine reward, and the legs are a mini-boss drop. There is no single quest that unlocks the full set, which is why most players find the pieces in a specific order rather than all at once.
What level should Atsu be before attempting the snake armor grind?
Around level 18 is the practical minimum, because the bounty that awards the head piece is tuned for that range. Players who attempt the bounty below level 18 will still clear it, but the fight will be longer and the Snake Fang drop rate is not affected by player level. Going above level 22 does not improve the drop rate either, so the grind is most efficient in the recommended level band.
Does the set bonus stack with the parry mastery skill?
Yes, but the stacking is multiplicative rather than additive. The parry mastery skill widens the parry window, and the snake set’s trigger window extends the punish window after a successful parry. Both effects trigger independently, so a player with parry mastery at max rank will get the most out of the set. Players who do not have parry mastery unlocked yet will still benefit from the set, just by a smaller margin.
Can the snake armor be dyed or recolored?
Yes, but only after the full set is assembled. The dye merchant in the central river valley offers a limited palette of natural colors for the snake set, and the palette is themed around the same river and forest tones that the materials come from. The dye is also a separate cost from the upgrade materials, so the player should expect to spend a small amount of in-game currency on top of the grind if they want a custom look.
Is the Mythic Coil required to clear the main story?
No. The +5 build is the practical cap for story content, and the +6 tier with the Mythic Coil is a post-game optimization. Players who do not want to farm the late-game challenge can safely leave the set at +5 without losing access to any quest. The Mythic Coil is also a single-drop item, so failing the late-game challenge means waiting for the next reset, which is another reason it is not worth pursuing for a story-only run.
What happens if I dismantle a snake armor piece by accident?
The game returns a fraction of the upgrade materials, and the player can re-purchase the base piece from the same source they originally found it. The upgrade levels on the dismantled piece are not preserved, so the player has to re-upgrade from +1. The dismantle option also has a confirmation prompt, which the player can disable in the settings if they find it annoying, but it is worth keeping on for the first playthrough.
Does the snake set work with the ghost weapon?
Partially. The ghost weapon’s special attacks count as heavy attacks, so the snake set’s counter-hit bonus applies to them. The trigger window does not extend to ghost weapon follow-ups, because the trigger is gated to melee parries specifically. Players who like the ghost weapon should still see a meaningful damage bump on the heavy follow-ups, but they should not expect the full loop to chain from a ghost weapon swing.
Can two players trade snake armor pieces in co-op?
No. Armor pieces are character-bound in the current build, and the co-op mode does not include gear trading. Players who want a full set in co-op have to assemble the four pieces on each character independently. The co-op mode does share some material drops, but the armor itself is not transferable, which is a small reason the grind feels longer in a co-op playthrough.
Is the snake set viable in the final duels of the game?
It is viable but not optimal. The set’s parry-focused loop works against the final duels, but the bear set’s poise bonus is more forgiving against enemies with multi-hit attack chains. Players who want a single set for the entire game should consider the bear set, and players who want the most satisfying single-target loop should commit to the snake set and accept the higher learning curve. A hybrid approach, where the player switches to the bear set for the second half of the final region, is also a reasonable middle ground.
Players looking for a related collectible route in a different open-world game will find the Horizon Zero Dawn power cell locations guide useful as a comparison for how route planning and collectible density change the feel of a long playthrough. For a look at how a different studio’s live-service game handles the same kind of grind pressure that the snake armor’s material loop demands, the Roblox Jujutsu Infinite codes article covers the same tension between long-term goals and short-session rewards.

Leave a Reply