

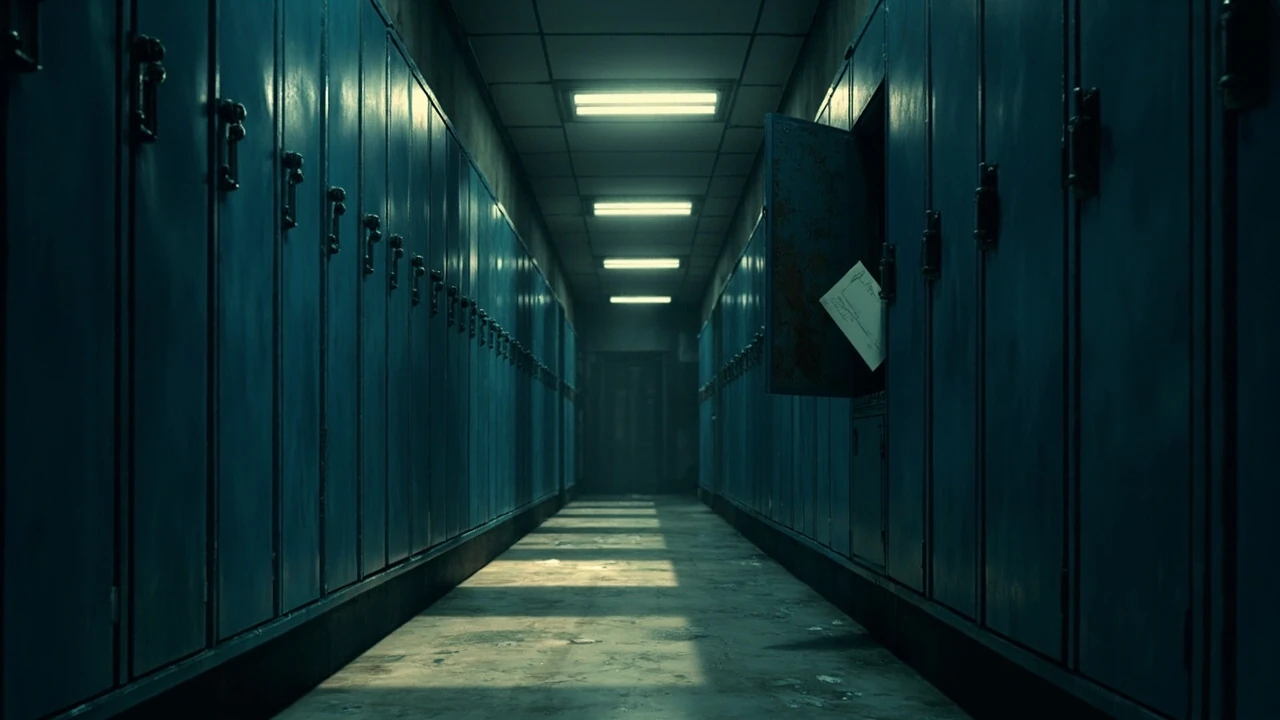
Silent Hill f locker code: how the girl code puzzle works in Ebisugaoka
The Silent Hill f locker code is the puzzle that gates most of the Ebisugaoka Middle School chapter. You cannot reach the Key to the Back Mountains, the path that lets Hinako leave the school grounds, without first cracking a student-invented cipher and then using one of the decoded combinations. The whole sequence reads like a classic survival horror key hunt: a locked security cabinet, a chain of classroom keys, an Annex full of cryptic notes, and finally a row of lockers that only open once you understand the language the students wrote in.
What makes the Silent Hill f locker code unusual is that it is built on a homemade substitution cipher the in-game students call “girl code.” The students at Ebisugaoka invented a numerical version of what looks, in the English localization, like an early form of l33tspeak. Once you learn the rule for translating it, the combinations fall out of a few short clues scattered around the Annex. The combinations themselves shift based on the puzzle difficulty you chose at the start of the playthrough, but the cipher and the steps to reach the lockers do not change.
This guide walks through the full sequence in the order the game presents it, explains the girl code cipher, lists every locker combination on every difficulty, and notes the rewards waiting inside each locker. Where the official guide only confirms one difficulty, the table below marks the entry as a community observation rather than a verified fact, so you can tell at a glance which numbers are confirmed and which still carry a question.
What the girl code cipher actually is
Girl code is a single-rule substitution cipher. Each letter that resembles a number, or each number that resembles a letter, swaps with its visual twin. Read the school’s posters and origami notes and you will see phrases where every E has become a 3, every A has become a 4, every I has become a 1, and so on. The rule, as described in the school notes and the IGN guide, is the simplest possible form of visual substitution: “exchange letters with similar-looking numbers or punctuation marks, and vice versa.”
That single rule is enough to decode Ayumi’s clue, the Suga hint, the Aoi hint, and the Taiko hint. The trick is that the rule is not a one-to-one map. In practice, the game only relies on a handful of swaps for its three-letter combinations, and once you memorize those, you do not need to translate a full alphabet to solve the lockers.
The swaps that actually matter for the Silent Hill f locker code are listed below. Anything not in this short list is decoration around the puzzle, not part of the solution.
- 1 ↔ I
- 3 ↔ E
- 4 ↔ A
- 5 ↔ S
- 7 ↔ T
- 0 ↔ O
- 9 ↔ G (used in the Suga distress signal rather than the Ayumi word clues)
Read the school’s notes with that table in mind and the three-digit combinations stop looking random. They are short English words written in a way that no one would normally type.
Step-by-step: reaching Ayumi’s locker in Ebisugaoka
The Silent Hill f locker code is buried at the end of a longer key chain. Before you can stand in front of Ayumi’s locker, you need to clear the rest of the school’s locks. The order below is the path the game lays out, and it matches the puzzle flow described in the verified Ebisugaoka guide.
- Check the security cabinet in the 1F lobby office. It is locked and the key is not in the same room.
- Solve the Secret Box puzzle to obtain the Second Floor Generic Classroom Key.
- Use the Second Floor Generic Classroom Key to open the two locked classrooms on the east end of 2F.
- Read the Note to Teacher file on the podium of the closer of the two classrooms; it tells you Ayumi found a lost key and left it in her locker, and it also gives you the Old Annex Main Gate Key.
- Use the Old Annex Main Gate Key to enter the Annex on the north side of 1F.
- Read the student notes scattered through the Annex hall and the two unlocked classrooms. These notes show girl code in use and are what let you learn the cipher.
- Enter Ayumi’s classroom on the west end of the Annex, read the seating chart on the teacher’s podium, then check Ayumi’s desk for Asakura’s Textbook and the Locker Room Key.
- Use the Locker Room Key on the girls’ side of the 1F locker room to access Ayumi’s locker.
That is the entire prerequisite chain. Nothing in the chain is optional if you want to finish the school, because the Key Cabinet Key inside Ayumi’s locker is what unlocks the office cabinet that holds the Key to the Back Mountains. Without that key, you cannot leave Ebisugaoka.
Every Silent Hill f locker code by difficulty
Ayumi’s combination is the only one that changes between difficulties. The other three lockers keep the same numbers regardless of the setting you chose at the start of the run, which makes the secondary combinations safe to look up in advance if you want to plan your inventory around the rewards.
| Locker owner | Story | Hard | Lost in the Fog | Clue location |
|---|---|---|---|---|
| Ayumi | 5 3 4 (SEA) | 8 0 8 (BUB) | 0 6 0 (EGG) | Asakura’s Textbook on Ayumi’s desk; Hard also uses the Note from a Male Student |
| Takeshi Aoi | 4 0 7 (AOT) | 4 0 7 (AOT) | 4 0 7 (AOT) | Origami of Grievances in the cubbyholes at the back of Ayumi’s classroom |
| Suga Yosie | 9 0 8 (GOB / SOS-like distress) | 9 0 8 | 9 0 8 | Origami of Grievances inside Aoi’s locker |
| Tschuiya Taiko | 6 4 7 (GAT) | 6 4 7 | 6 4 7 | Origami of Grievances (an origami crane) on a stack of books in the back of the northern classroom on the east end of 2F |
Ayumi’s three combinations are the only ones verified by the official guide at the time of writing. Suga, Aoi, and Taiko keep stable numbers across the three difficulties, and the table reflects what the guide reports verbatim. Treat the row labels as the verified number, and treat the difficulty columns as fixed rather than escalating.
Decoding the Ayumi combinations with girl code
Each of Ayumi’s three difficulty-specific clues is a short monologue in her own voice. The “code” is just the last word of the monologue, run through girl code. Reading the Asakura’s Textbook page and the Note from a Male Student gives you the three cue phrases, and applying the swap table above turns the cue into the three digits you dial.
The table below restates the combinations as English words and shows the letter-to-number mapping for each letter, so you can see the cipher in action rather than just memorize digits.
| Difficulty | Cue line (excerpt) | Word | Letters | Numbers |
|---|---|---|---|---|
| Story | “It’s so lovely, it’s now my locker combination!” | SEA | S E A | 5 3 4 |
| Hard | “Bus! BUS! The best thing in the world!” | BUB | B U B (with B rendered as 8 in Hard) | 8 0 8 |
| Lost in the Fog | “No matter what, it always comes out delicious!” | EGG | E G G | 3 6 6 (note: the guide encodes the middle G as 6, not 9) |
The Hard row is the only one that uses a non-table swap. The Note from a Male Student, found on the overgrown side table on the west end of the Annex hallway, gives the second letter of the word. The first and last letters are spelled out in Asakura’s Textbook. Together, the three letters form a word whose visual shape, not its dictionary spelling, becomes the dial sequence. This is the one place where the Silent Hill f locker code stops being a clean letter-to-number map and starts being a small visual riddle, which is why it is the trickiest of the three difficulties.
What each locker actually contains
The For additional context, lockers are not just a cipher exercise. Each one holds an item that feeds back into the school’s main progression, and a few of them become more valuable on subsequent runs. The list below pairs every combination in the previous table with its reward.
- Ayumi’s locker: Key Cabinet Key on every difficulty. Use it in the school office to open the security cabinet and pick up the Key to the Back Mountains.
- Takeshi Aoi’s locker: another Origami of Grievances. It is narrative rather than functional, but it is the note that hands you Suga’s clue.
- Suga Yosie’s locker: School Bag, which expands Hinako’s inventory by one slot. On NG+ runs, this is replaced with a Shriveled Abu-age offering.
- Tschuiya Taiko’s locker: Omamori [Wolf] charm. On subsequent runs, the same locker instead holds a Dried Carcass.
The Omamori and the inventory bag are the two real prizes among the optional lockers, because they affect how the rest of the school plays. The other two lockers exist to close the loop on the girl code writing mechanic and to hand you a piece of the school map you would otherwise miss.
Why the Silent Hill f locker code matters to the chapter
The locker puzzle is not a side activity bolted onto the Ebisugaoka chapter. It is the chapter’s spine. The Key to the Back Mountains is the only thing that lets you leave the school grounds, and that key is reachable only through Ayumi’s locker, which is reachable only through girl code, which is reachable only through the notes scattered around the Annex. If the cipher never clicks for you, the rest of the school is locked behind it.
That tight coupling is also why the developers kept the optional lockers in the same room. The Origami of Grievances for Aoi, Suga, and Taiko are the in-fiction reason the school’s students learned girl code in the first place, and the rewards inside those lockers are why the game bothers to teach you the cipher beyond the bare minimum. If you are willing to spend a few extra minutes on the puzzle, you leave the school with more inventory space and a stronger charm than you started with.
Troubleshooting the locker code puzzle
The Silent Hill f locker code has a small number of failure modes, and most of them are setup problems rather than cipher problems. The list below covers the cases where a locker refuses to open even after you think you have the right number.
- You have the right combination but the wrong room. Ayumi’s locker is on the girls’ side of the 1F locker room. The boys’ side of the same room has Suga, Aoi, and Taiko’s lockers.
- You have not read the Note from a Male Student. On Hard difficulty, the second letter of the combination is not in Asakura’s Textbook. The note is on an overgrown side table on the west end of the Annex hallway.
- You are applying the wrong swap for G. Girl code treats G as 9 in distress-signal contexts, but the school uses 6 for the second and third letters of EGG on Lost in the Fog. If you have been using 9 across the board, that is the source of the mismatch.
- You skipped the seating chart. The seating chart on the teacher’s podium in Ayumi’s classroom confirms which desk is hers. Without it, it is easy to read Asakura’s Textbook from the wrong desk and miss the Locker Room Key.
- You have the Locker Room Key but not the girls’ side access. The key only opens the girls’ side of the locker room. The boys’ side is reached through a different door in the same room.
If the lock still does not turn after all of that, the most likely cause is that the combination you are entering is from the wrong difficulty row. The numbers look superficially similar, and the School difficulty combination is the one most players memorize first, so it is easy to enter 5-3-4 on a Hard save by accident.
How the locker code changes between runs and difficulties
Ayumi’s three numbers are the only part of the Silent Hill f locker code that shifts based on your choices. The other three lockers use the same numbers on every save file, and the clue locations do not move. The only meaningful variation between runs is the difficulty you pick at the start of a save, and that choice only changes Ayumi’s three-digit dial.
There is also a smaller layer of variation that shows up after your first run. Suga’s School Bag, which gives you the inventory slot, is replaced with a Shriveled Abu-age offering on NG+. Taiko’s Omamori [Wolf] is replaced with a Dried Carcass in the same slot on NG+. The lockers themselves do not move and the numbers do not change, so the only thing worth tracking between runs is which reward you actually want on a given playthrough.
The full set of variations is summarized in the table below, including the NG+ behavior that the official guide calls out.
| Item | First run reward | NG+ reward | Notes |
|---|---|---|---|
| Key Cabinet Key (Ayumi) | Key Cabinet Key | Key Cabinet Key | Unchanged. Required for the Key to the Back Mountains. |
| School Bag (Suga) | School Bag (inventory +1) | Shriveled Abu-age | Inventory expansion is a one-time benefit per save file. |
| Omamori [Wolf] (Taiko) | Omamori [Wolf] | Dried Carcass | Charm effects are most useful on the first run. |
| Origami of Grievances (Aoi) | Origami of Grievances | Origami of Grievances | Narrative item, no combat use. |
If you are planning a New Game Plus run specifically to chase the alternate rewards, the only decision that matters is whether you want the inventory slot or the offering on Suga’s side, and whether you want the charm or the carcass on Taiko’s side. The dial numbers themselves do not change.
Game design notes: why Silent Hill f built a whole cipher for one chapter
The decision to gate a school chapter behind a homemade cipher is unusual even within the survival horror genre, where puzzle keys are usually a found object rather than a learned language. Silent Hill f uses the locker code the way other games use a keycard: it is the binary switch between “stuck in the school” and “leaving the school.” The cipher is the cost of that switch, and the rewards inside the optional lockers are the game’s way of rewarding the players who are willing to learn the language rather than just brute-forcing three digits.
There is also a design reason the cipher uses so few rules. Girl code is meant to feel like a real student invention, which means it has to be readable in the wild without a decoder ring. The Annex is full of notes written in the cipher, and the player has to recognize the pattern from those notes before they can apply it to Ayumi’s textbook. If the cipher were a full substitution alphabet, the wild notes would not be legible at a glance, and the puzzle would collapse into a lookup table. By keeping the rule to “letters that look like numbers,” the designers let players learn girl code in the Annex and then use it in the locker room without ever pausing the game.
For a GameDev reader, the takeaway is that the locker code is an example of a single-rule puzzle carrying an entire chapter. The cipher does double duty: it teaches a language, and it gates a progression item. The optional lockers then use the same language to deliver side rewards, which means the cost of designing the puzzle is amortized across the chapter’s main path and its three optional paths. That is a more efficient puzzle budget than a single one-off combination, and it is the structural reason the puzzle feels larger than its three-digit dial.
Quick reference: the Silent Hill f locker code cheat sheet
If you just want the numbers without the full walkthrough, this section is the shortest reliable version of the guide. Read it once, dial the combination, and return to the rest of the school.
- Ayumi Story: 5, 3, 4 (girl code for SEA)
- Ayumi Hard: 8, 0, 8 (girl code for BUB, with the second letter taken from the Note from a Male Student)
- Ayumi Lost in the Fog: 0, 6, 0 (girl code for EGG)
- Takeshi Aoi: 4, 0, 7 (AOT, from the Origami of Grievances in Ayumi’s classroom)
- Suga Yosie: 9, 0, 8 (distress signal referenced in Aoi’s note)
- Tschuiya Taiko: 6, 4, 7 (from the origami crane in the back of the northern east-end 2F classroom)
Ayumi’s locker is the one that advances the chapter. The other three are optional, and you only need to crack them if you want the inventory slot, the charm, or the narrative closure.
Frequently asked questions
Where do I find the Silent Hill f locker code in the first place?
The Silent Hill f locker code is taught through the notes scattered around the Annex on the north side of 1F, and then applied to Asakura’s Textbook on Ayumi’s desk. The Annex is reachable after you solve the Secret Box puzzle, use the Second Floor Generic Classroom Key on the two locked east-end 2F classrooms, and then use the Old Annex Main Gate Key you find on the closer of those classroom podiums. The textbook and the Locker Room Key are on Ayumi’s desk, which you can identify by reading the seating chart on the classroom’s teacher podium.
What is girl code, exactly?
Girl code is the in-universe name for a homemade substitution cipher the students at Ebisugaoka use to pass notes. The rule is simple: any letter that visually resembles a number, or any number that visually resembles a letter, is swapped with that twin. In practice that means 1 ↔ I, 3 ↔ E, 4 ↔ A, 5 ↔ S, 7 ↔ T, 0 ↔ O, and a few others. The school calls it “girl code” because the notes that use it are written in a girlish hand and because the inventors were female students.
Does the combination change between Story, Hard, and Lost in the Fog?
Only Ayumi’s combination changes between difficulties. On Story it is 5-3-4, on Hard it is 8-0-8, and on Lost in the Fog it is 0-6-0. The other three lockers in the same room use the same numbers regardless of difficulty, so once you learn the cipher you do not need to relearn anything else for a higher-difficulty run.
Why is the Hard combination so strange?
On Hard, the second letter of Ayumi’s word is hidden in the Note from a Male Student, which is on an overgrown side table at the west end of the Annex hallway. The Hard combination is BUB, with the B rendered as 8 because of the way girl code treats the letter. Because that second letter is the one with the unusual shape, the Hard difficulty is the only one that requires you to read two separate documents to decode a single combination.
What is inside Ayumi’s locker, and is it required?
Ayumi’s locker contains the Key Cabinet Key, which is required. The Key Cabinet Key opens the security cabinet in the school office, and the security cabinet holds the Key to the Back Mountains. Without that key you cannot leave Ebisugaoka Middle School, so the Silent Hill f locker code is functionally a chapter gate rather than an optional puzzle.
Are the other three lockers worth opening?
Two of them are worth opening on a first run. Suga Yosie’s locker holds a School Bag that expands your inventory by one slot, and Tschuiya Taiko’s locker holds an Omamori [Wolf] charm. Takeshi Aoi’s locker only contains another Origami of Grievances, which is narrative. On NG+ runs, the inventory bag is replaced with a Shriveled Abu-age offering and the charm is replaced with a Dried Carcass, so the value of the optional lockers depends on which rewards you want on a given playthrough.
What happens if I dial the wrong combination?
You can redial the lockers. The dial does not break, lock out, or trigger a jump scare, and the game does not move on without you. You can also re-read the relevant note in the Annex to confirm the cipher rule before you try again, which is the safer approach if you have been switching between difficulties in your head.
Do the rewards reset between playthroughs?
The lockers do not reset, but the rewards do. On a New Game Plus save file, Suga’s School Bag becomes a Shriveled Abu-age offering, and Taiko’s Omamori [Wolf] becomes a Dried Carcass. Ayumi’s Key Cabinet Key and Aoi’s Origami of Grievances stay the same, because they are part of the chapter’s main path and its narrative set dressing, respectively.
Can I skip the locker puzzle and still leave the school?
No. The Key to the Back Mountains is the only path out of the school grounds, and the only way to reach it is through the Key Cabinet Key, which is inside Ayumi’s locker. There is no alternate exit, no hidden key that bypasses the locker, and no dialogue option that opens the security cabinet. The Silent Hill f locker code is the chapter’s hard gate.
Is the locker puzzle the same in the Japanese version?
The mechanics, locations, and step order are the same across localizations, because the puzzle is keyed to objects in the environment rather than to specific translated text. The decoded numbers themselves are stable across versions, so the combinations listed above apply regardless of the language you play in. The only thing that shifts between versions is the visual style of the notes, which always render as l33tspeak-style substitutions in the local alphabet.

Leave a Reply